How To Make Smoked Beef Jerky

I am sitting here having my morning coffee and enjoying a piece of beef jerky while I write this article. My family and I began learning how to make smoked beef jerky purely out of the love for this savory snack. It took us about 5 years to develop a recipe and process that produces the same consistent product every single batch.
We only make one savory flavor, but we have experimented with other flavors including a savory maple jerky that we made one summer and it was wildly successful. In fact, we have been approached by several local sugar houses wanting to add our jerky to their product line. We simply are not ready to grow to that level, which requires USDA monitoring of your meat handling process and equipment.
Over the years we have sold a ton of our jerky to our friends and neighbors. My daughter made it a full time summer job one year and submitted her business plan as an FFA project.
There are just so many reasons that this product is special to me, and with my son’s coaxing, I’ve decided to share our method with the homesteading world.
DISCLAIMER
This article is NOT about the science of the process, but about the process itself. For the sake of safety, no steps should be skipped. The process that I describe is clean, safe, and delicious. W
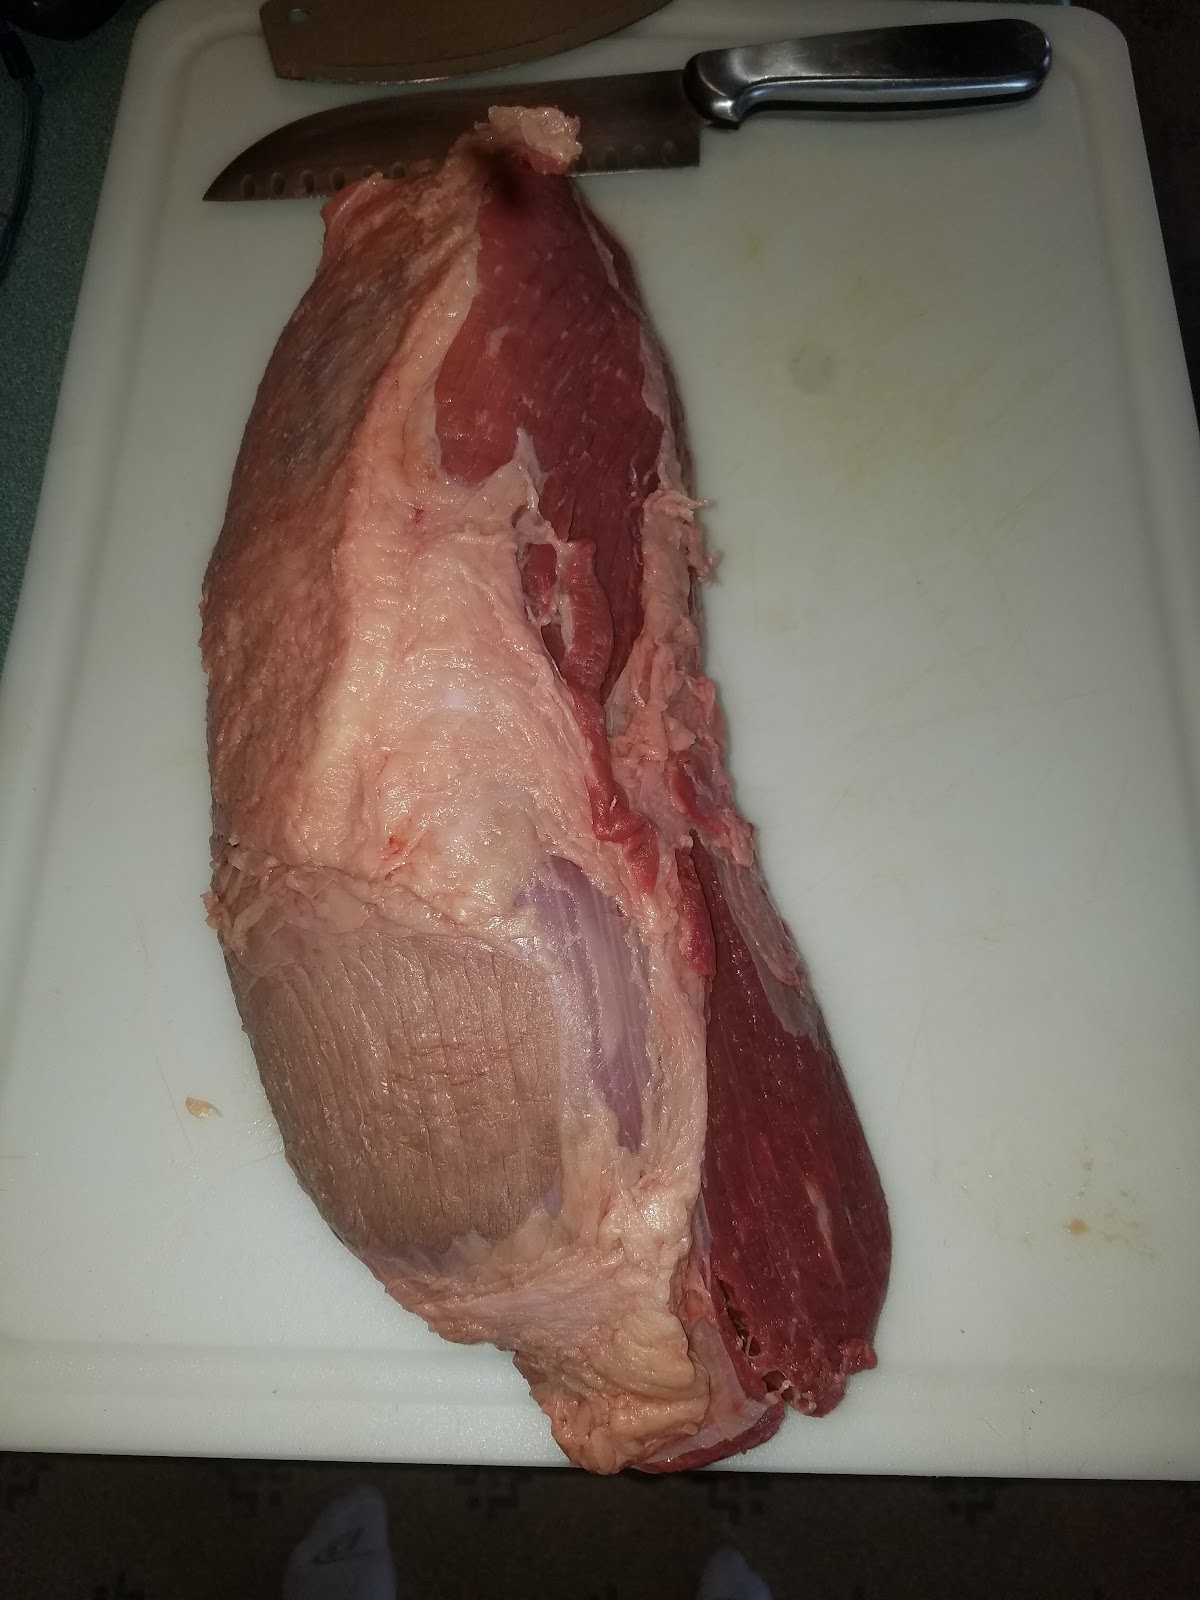
Best Cuts of Meat for Smoked Beef Jerky
You always want to use the LEANEST CUTS of meat for your jerky. I like to use eye rounds but have used thickly sliced London broil, chuck roast, and many other less expensive cuts. Any of these will be just fine.
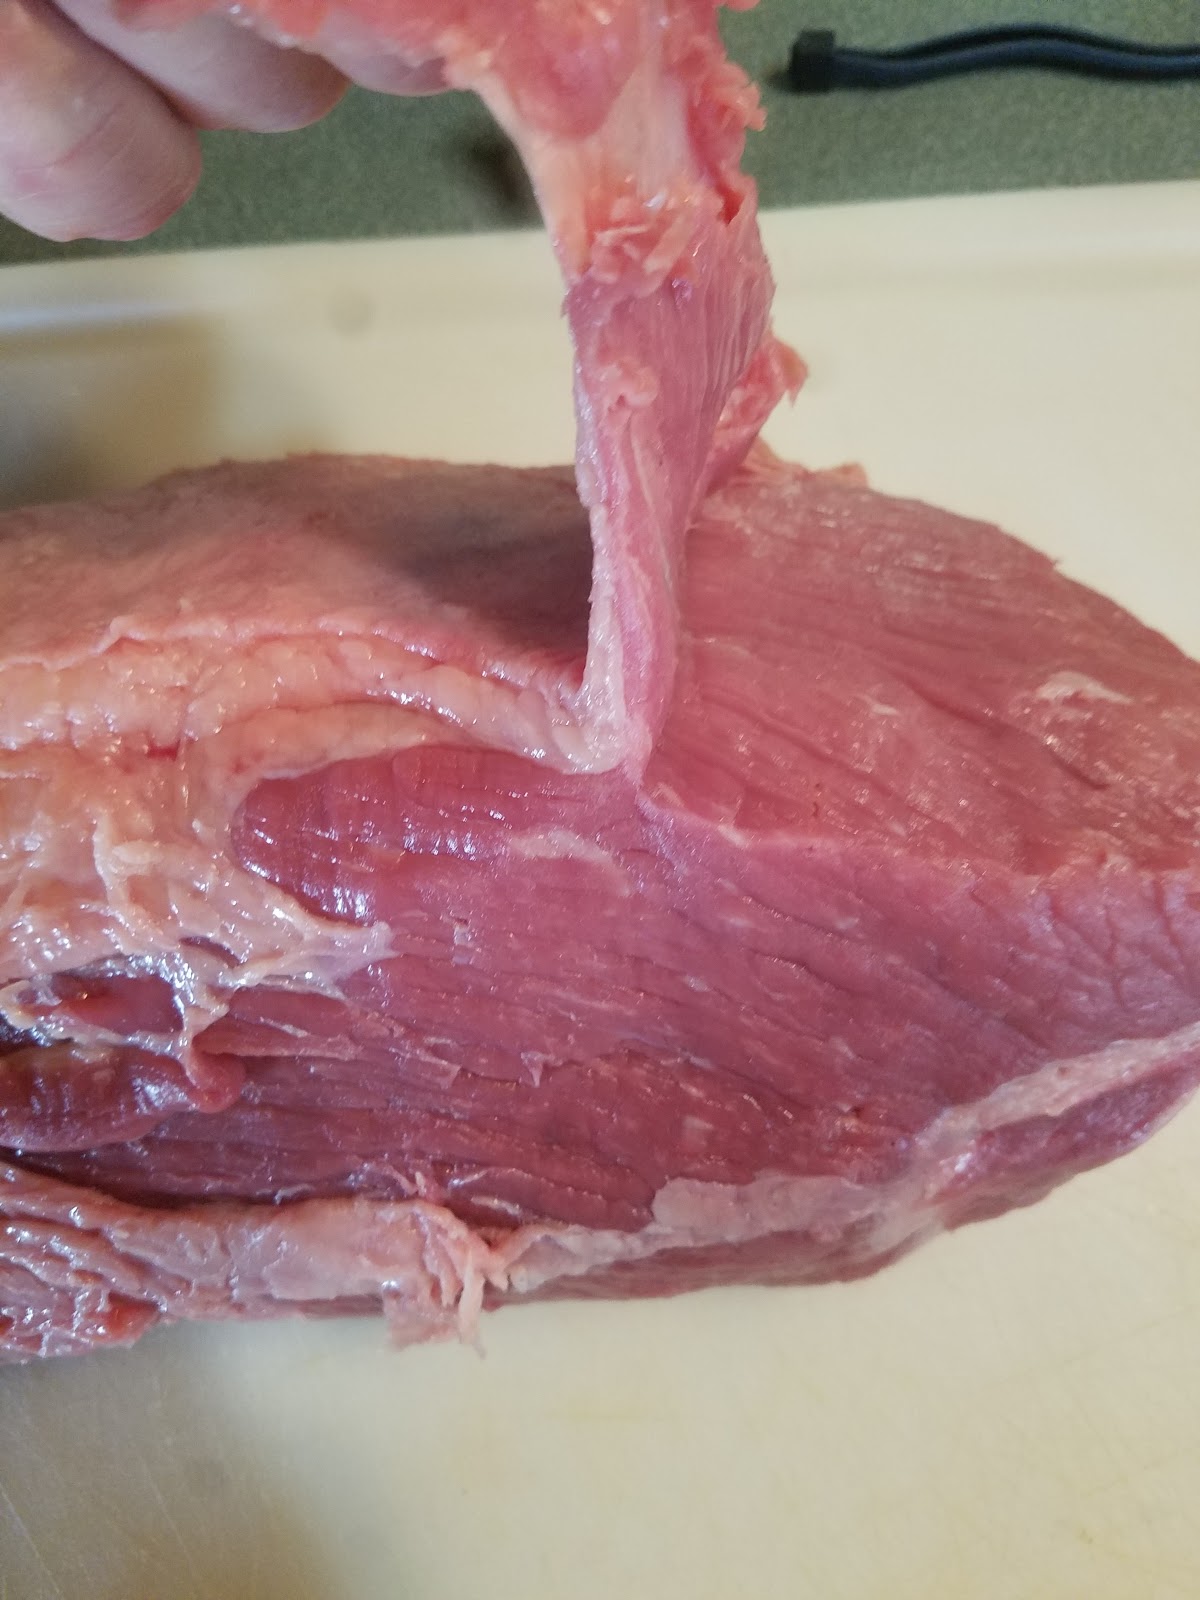
Trim the Fat!
The fat will go rancid if left on your jerky and will spoil the flavor of your final product.
Simply lift the fat and cut the membrane that adheres to the outside of your meat. Once de-fatted you are ready to slice.
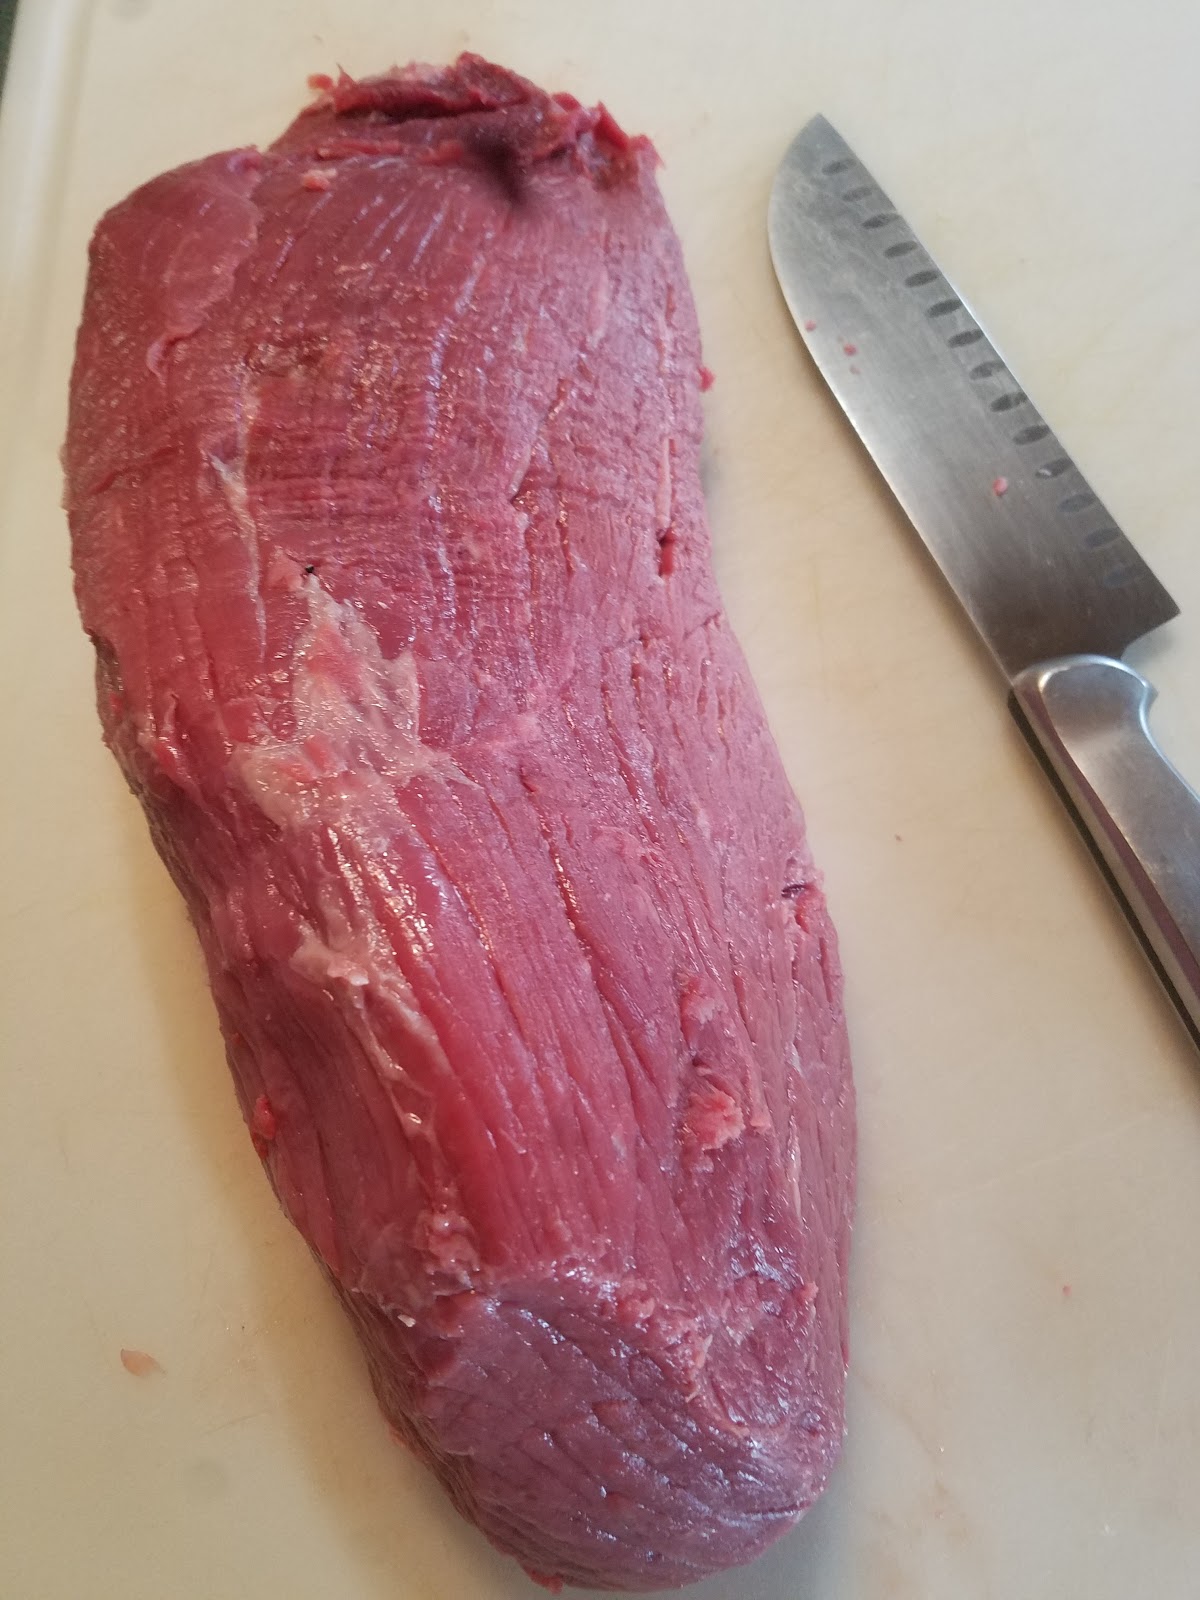
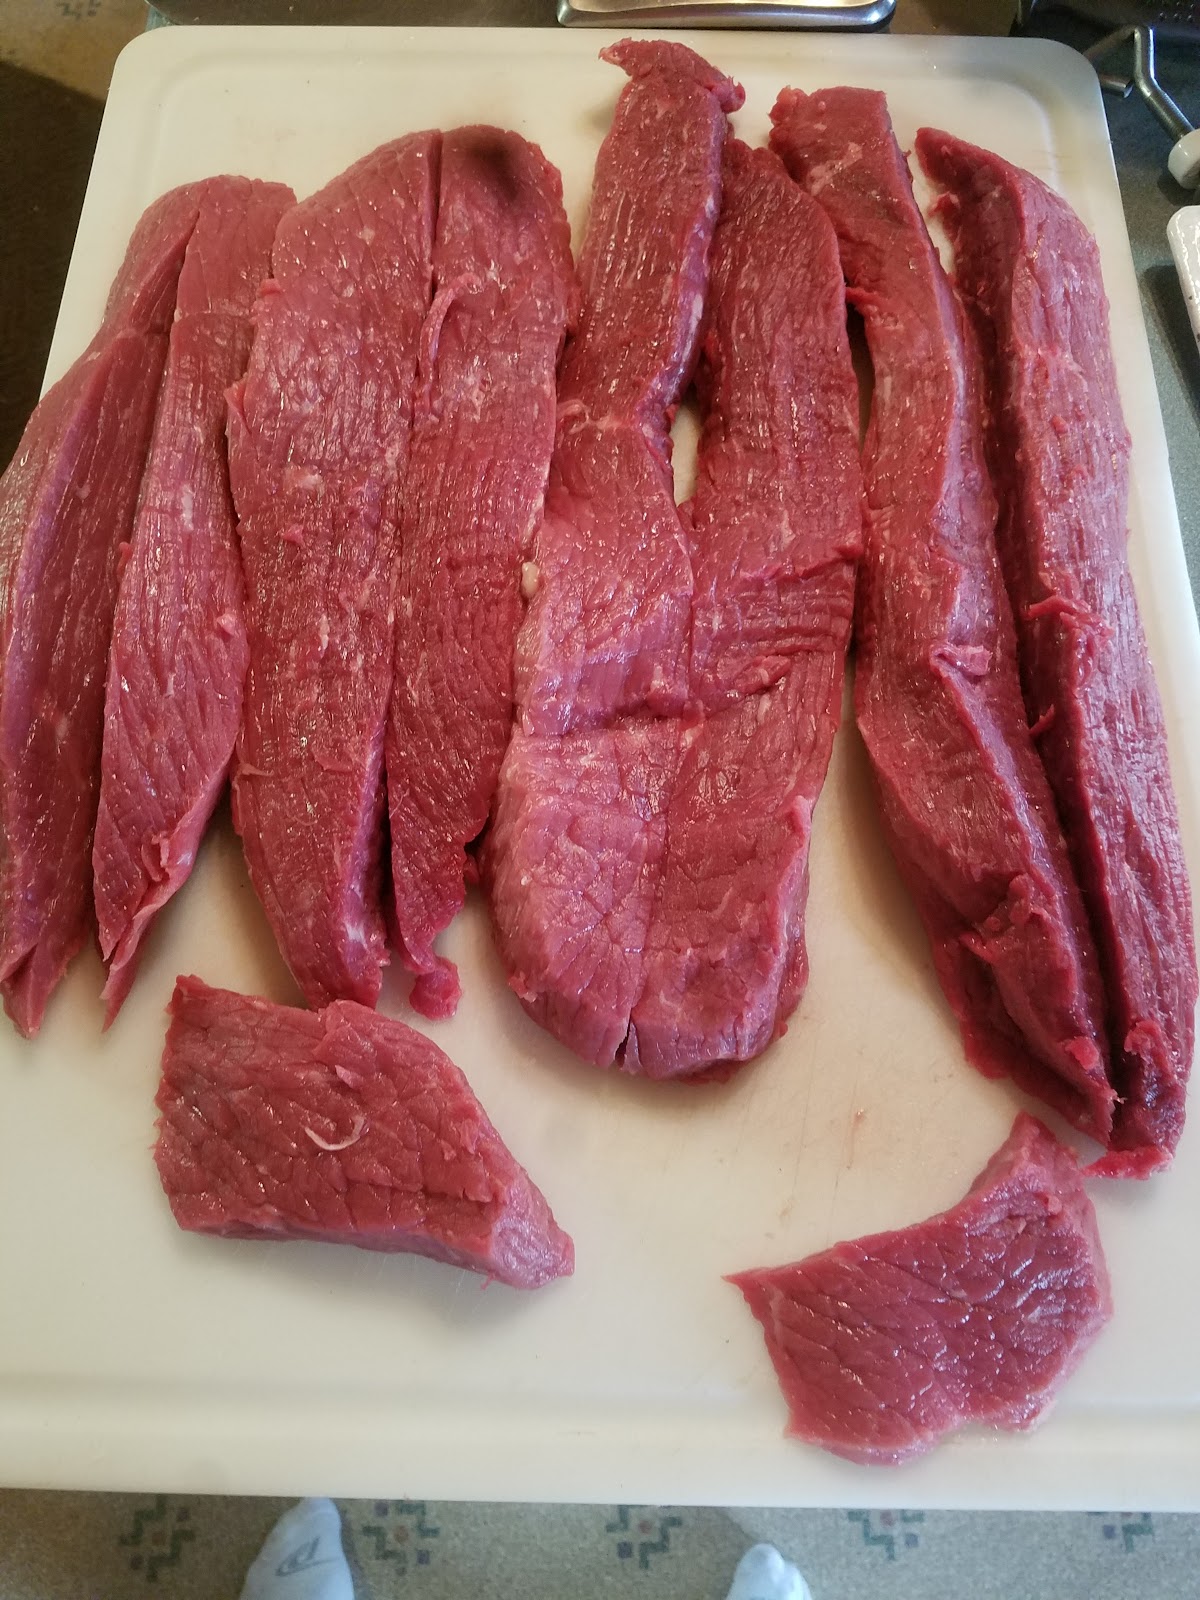
Cut to Fit!
At this point, we cut our meat to fit into a manual jerky slicing machine (More on that in a minute). But without such a machine you would simply slice the whole piece into ⅛-¼ inch strips by hand. Uniformity is not essential but will help normalize your smoking time. All pieces will finish at about the same time.
Beef Jerky Pro Tip:
If cutting by hand, it helps to cool the cut of meat down to just above freezing. This makes it easier to cut uniform slices. Also, make sure your knife is SHARP. BE CAREFUL!

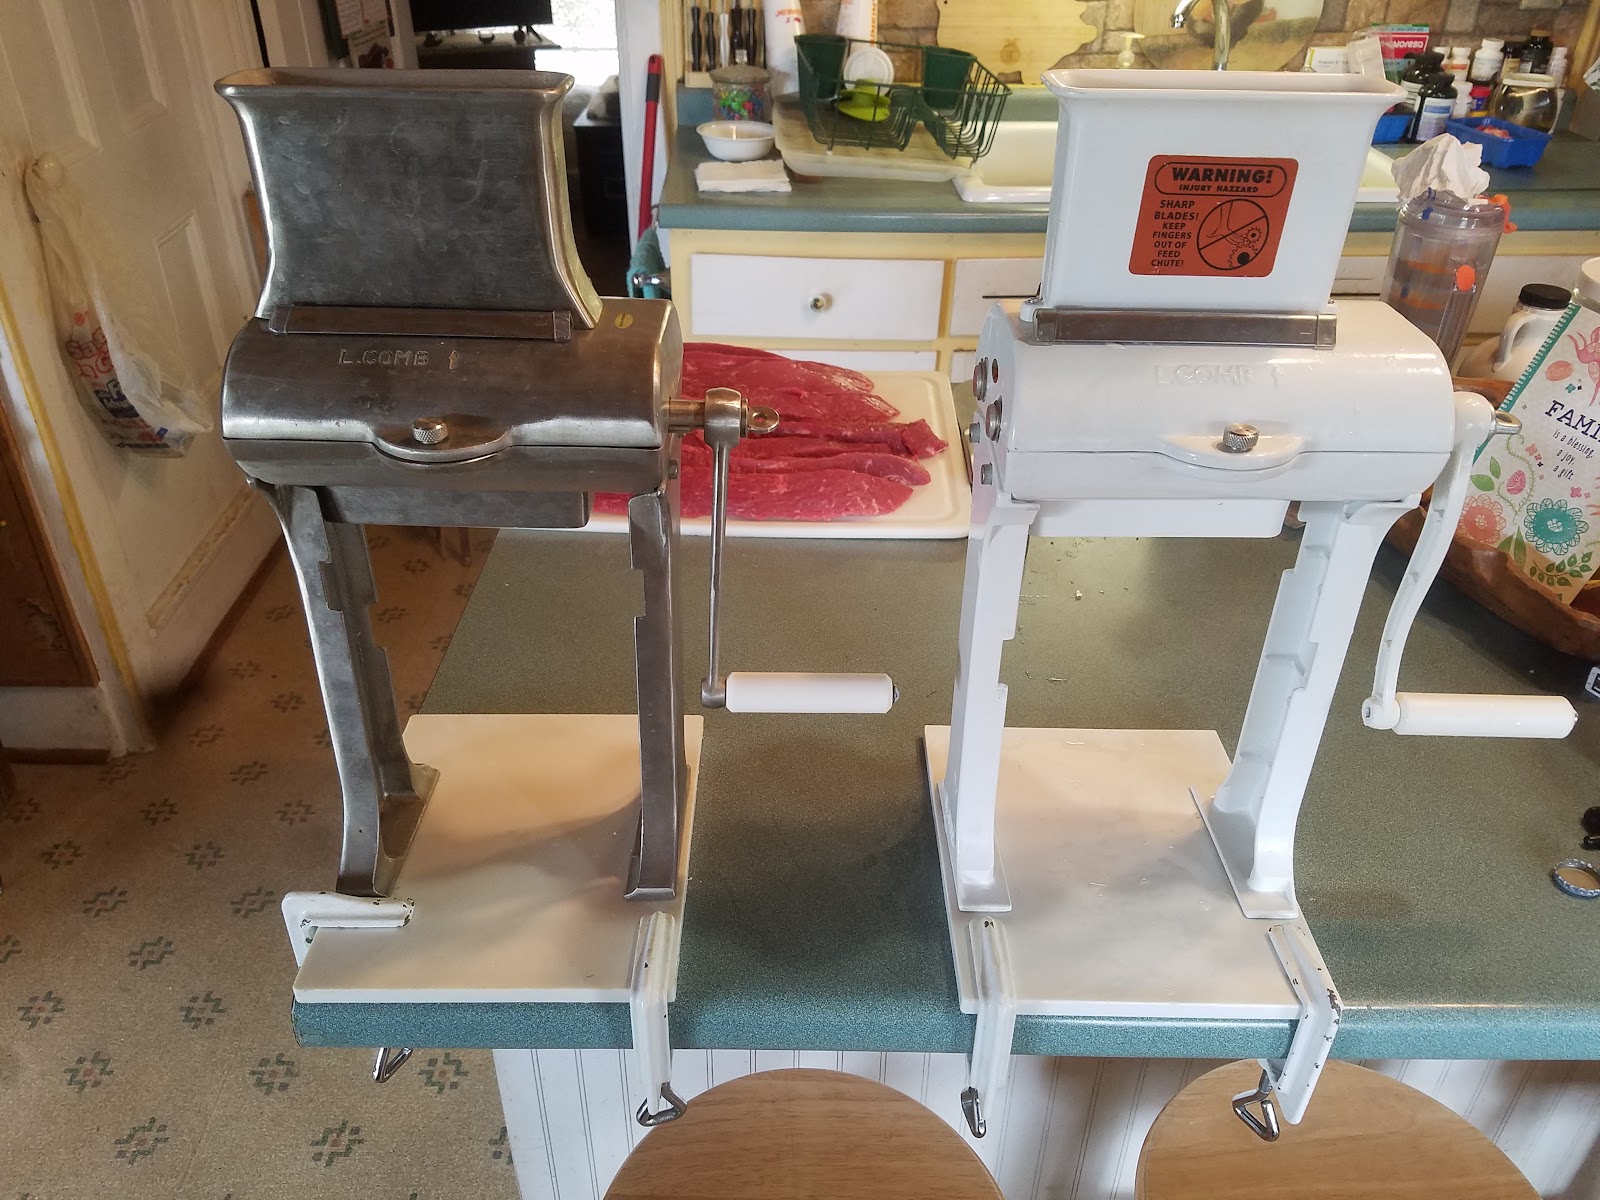
Our Beef Jerky Slicing Equipment
For our jerky, we use a slicer and a cuber. The machine on the left slices the beef into strips and the cuber on the right perforates and tenderizes the meat. This tenderizing makes the jerky much easier to chew and allows the marinade and cure to completely permeate the beef. If you have ever had jerky that you simply could not chew, it had not been cubed and tenderized.
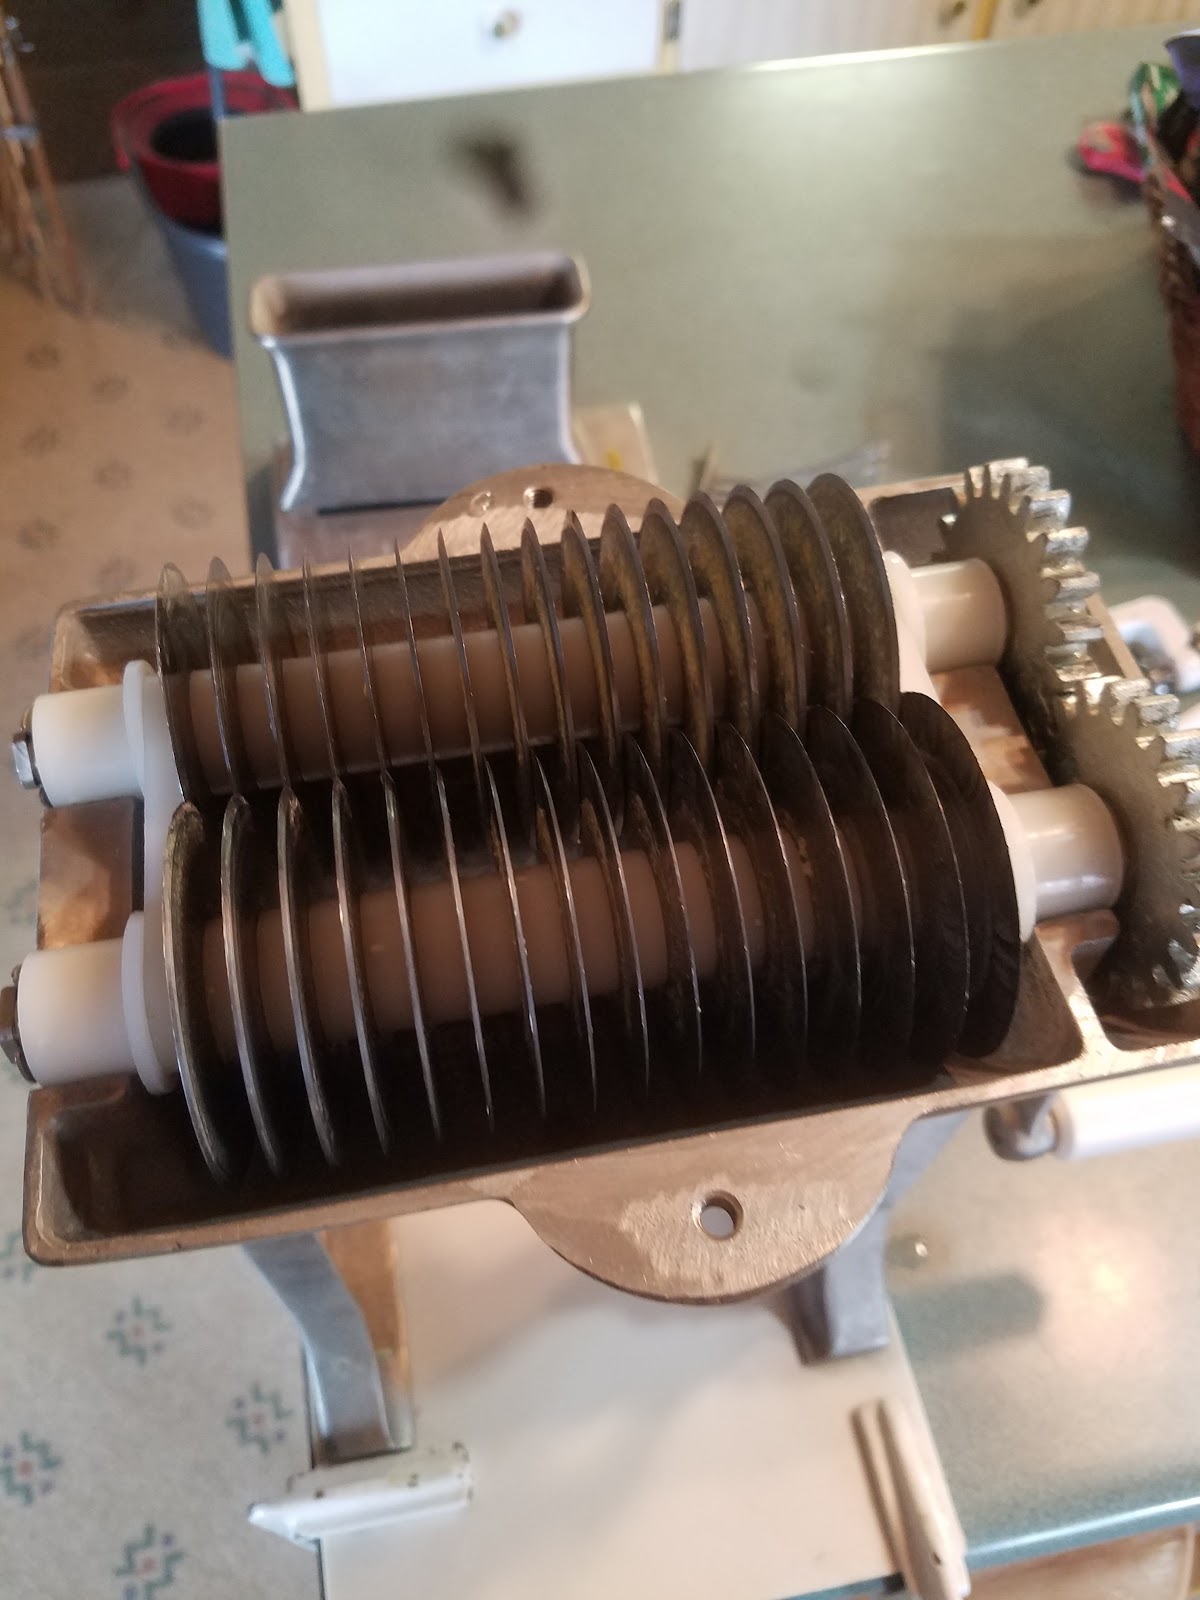
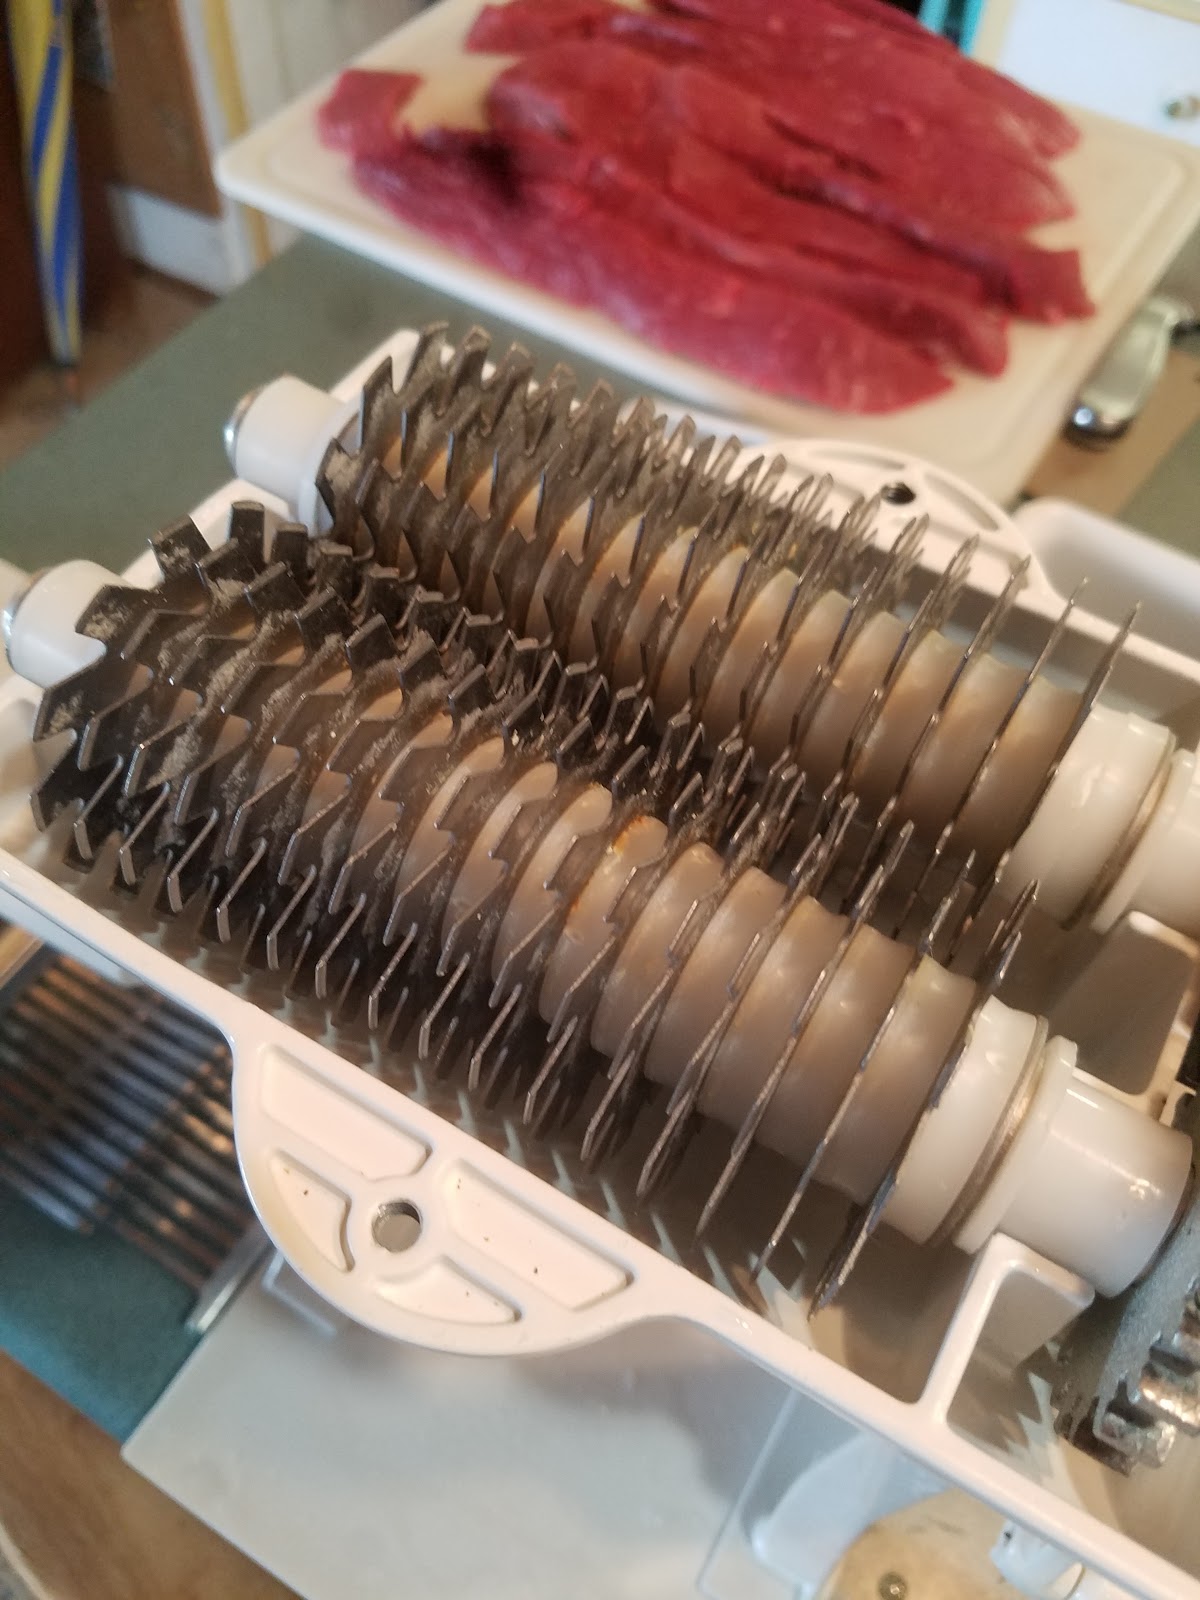
Slicer Blade vs. Cuber Blade
Slicing & Cubing the Meat
When you run the beef through the slicer they will come out in uniform ¼ inch strips.


You then run the strips through the cuber. I usually run these through the cuber 2-3 times.

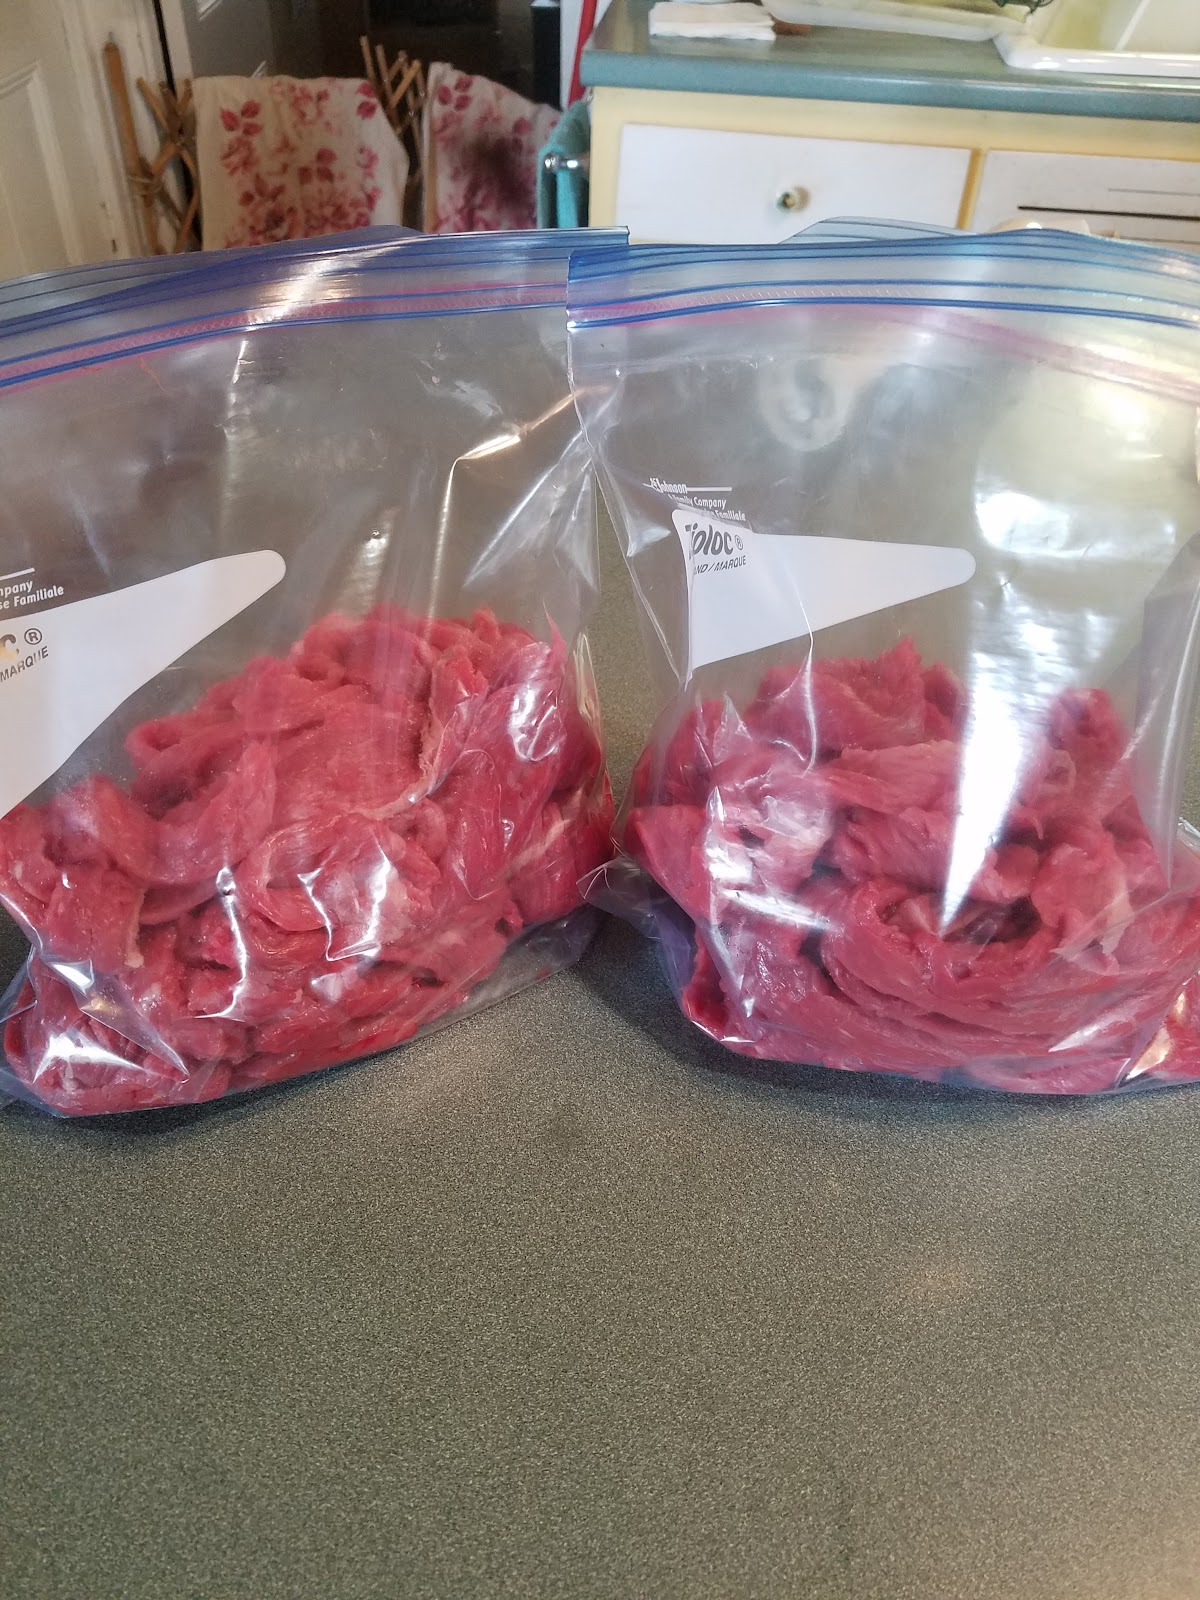
Curing & Marinating the Jerky
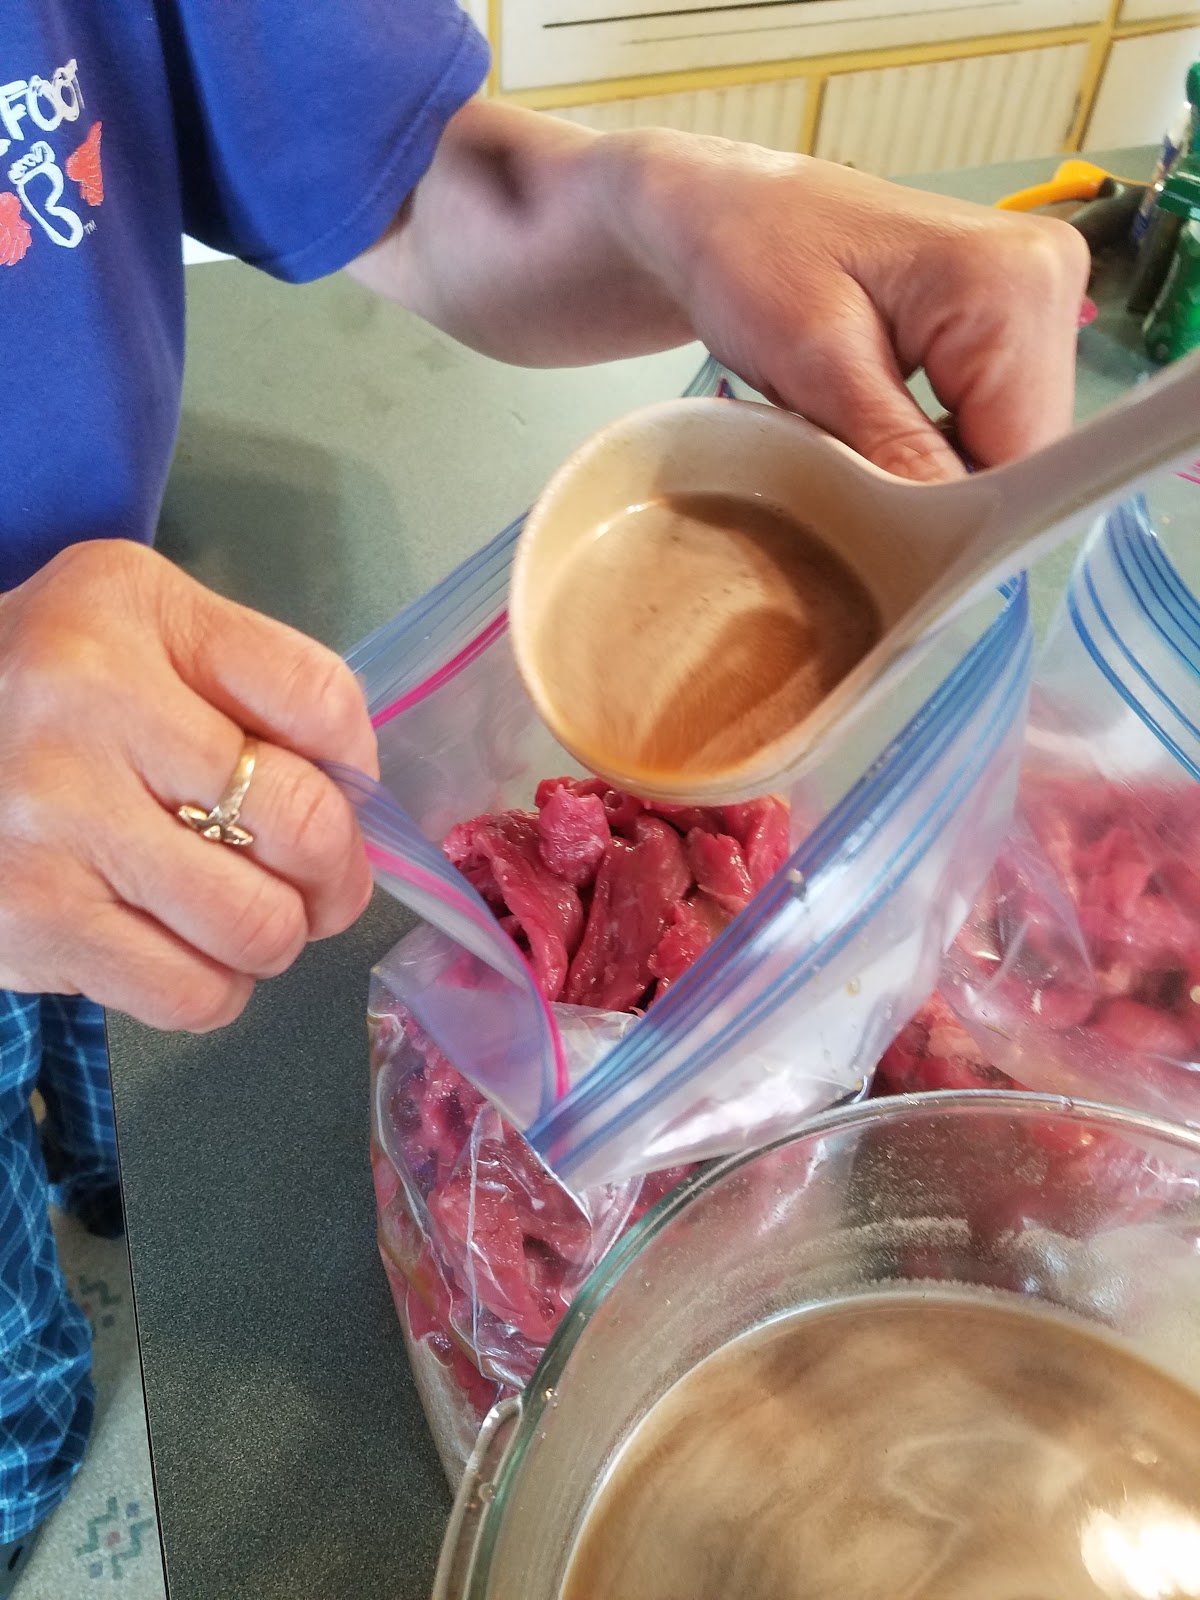
We then place the cubed strips into plastic bags for curing and marinating. Make sure they are evenly filled.
The Marinade and Cure
There are tons of commercially available cures and marinades on the market and most can be bought together. Its really hard to go wrong with any of them, I really can’t think of any that I wouldn’t recommend. It is always just a matter of personal taste. I highly recommend any that are sold by Cabela’s and the SausageMaker.com. (No affiliation, just great products!)
Quick Safety Note
Curing is crucial to make your beef jerky safe to eat! The cure is the ingredient you add to preserve the meat. This is most commonly a nitrate, nitrite, or curing salt. As I mentioned, this article isn’t about the science behind making beef jerky, so just follow the curing instructions exactly and you will be in good shape!
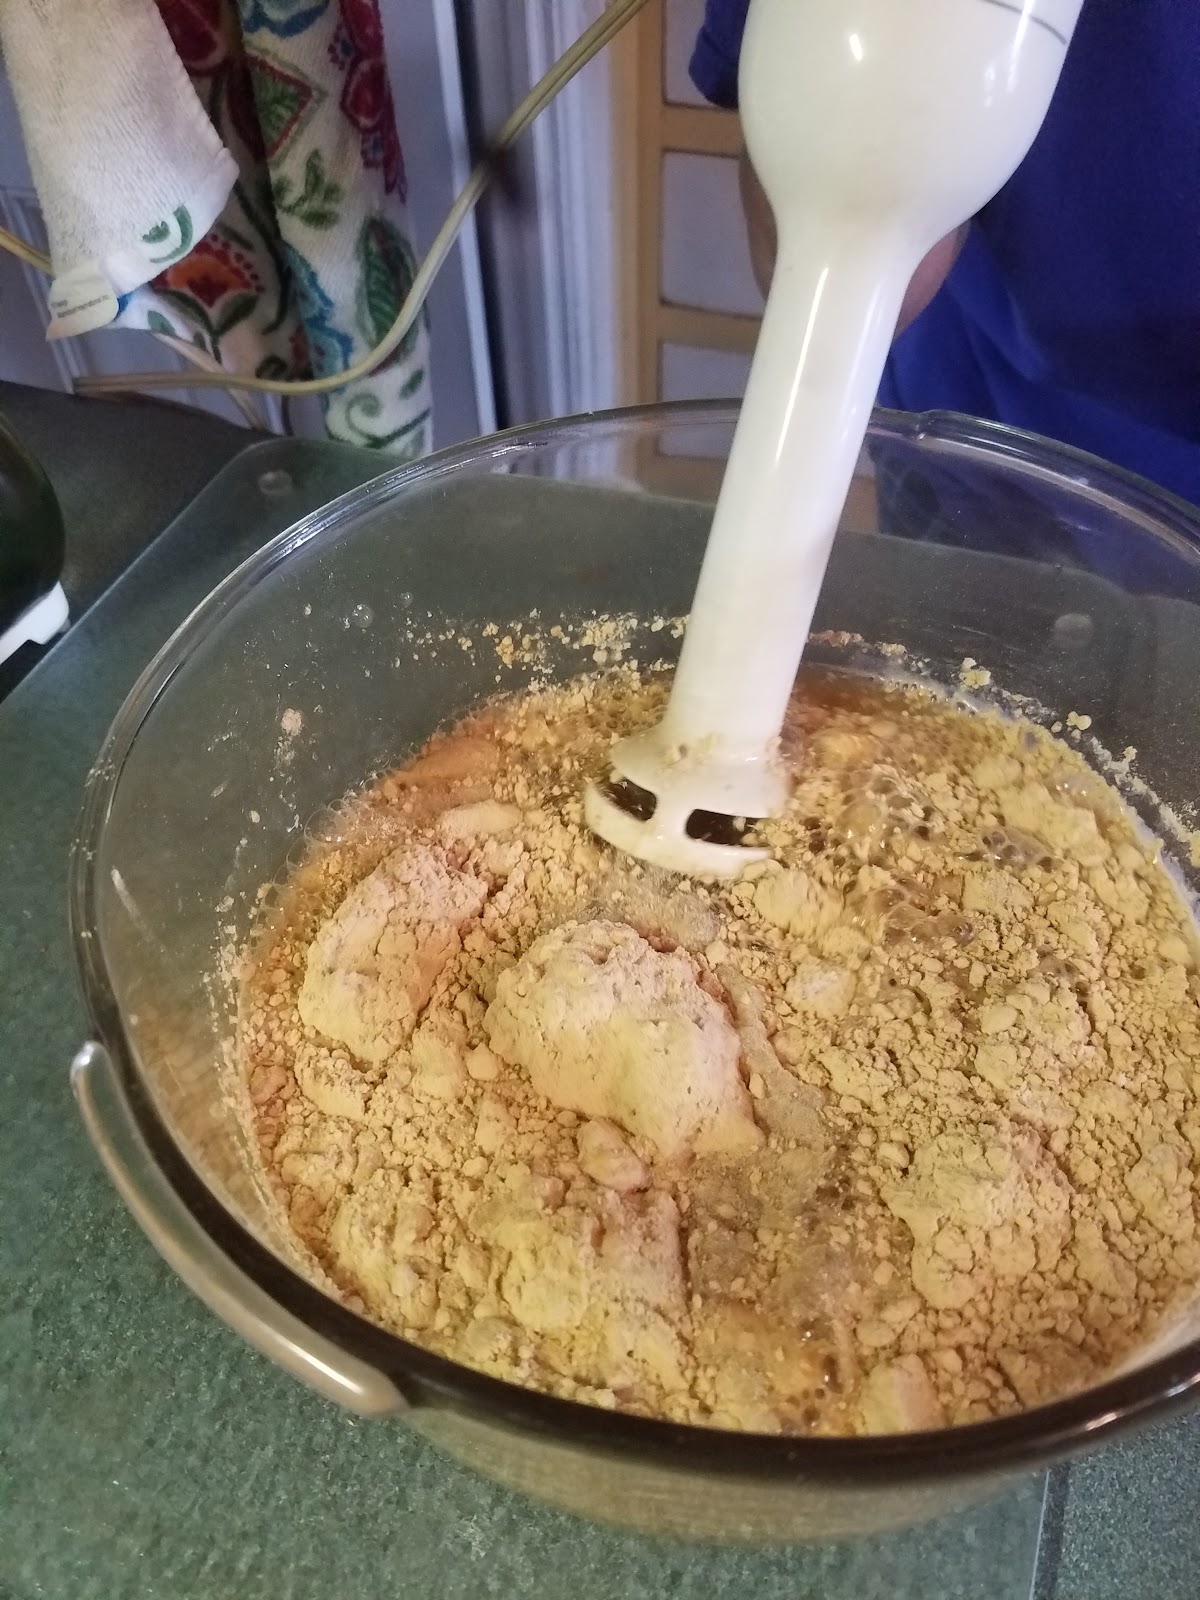
The recipes are always based upon the pounds of raw meat that we plan to marinate. We try to do batches of 5-6 lbs of beef. This helps with our consistency.
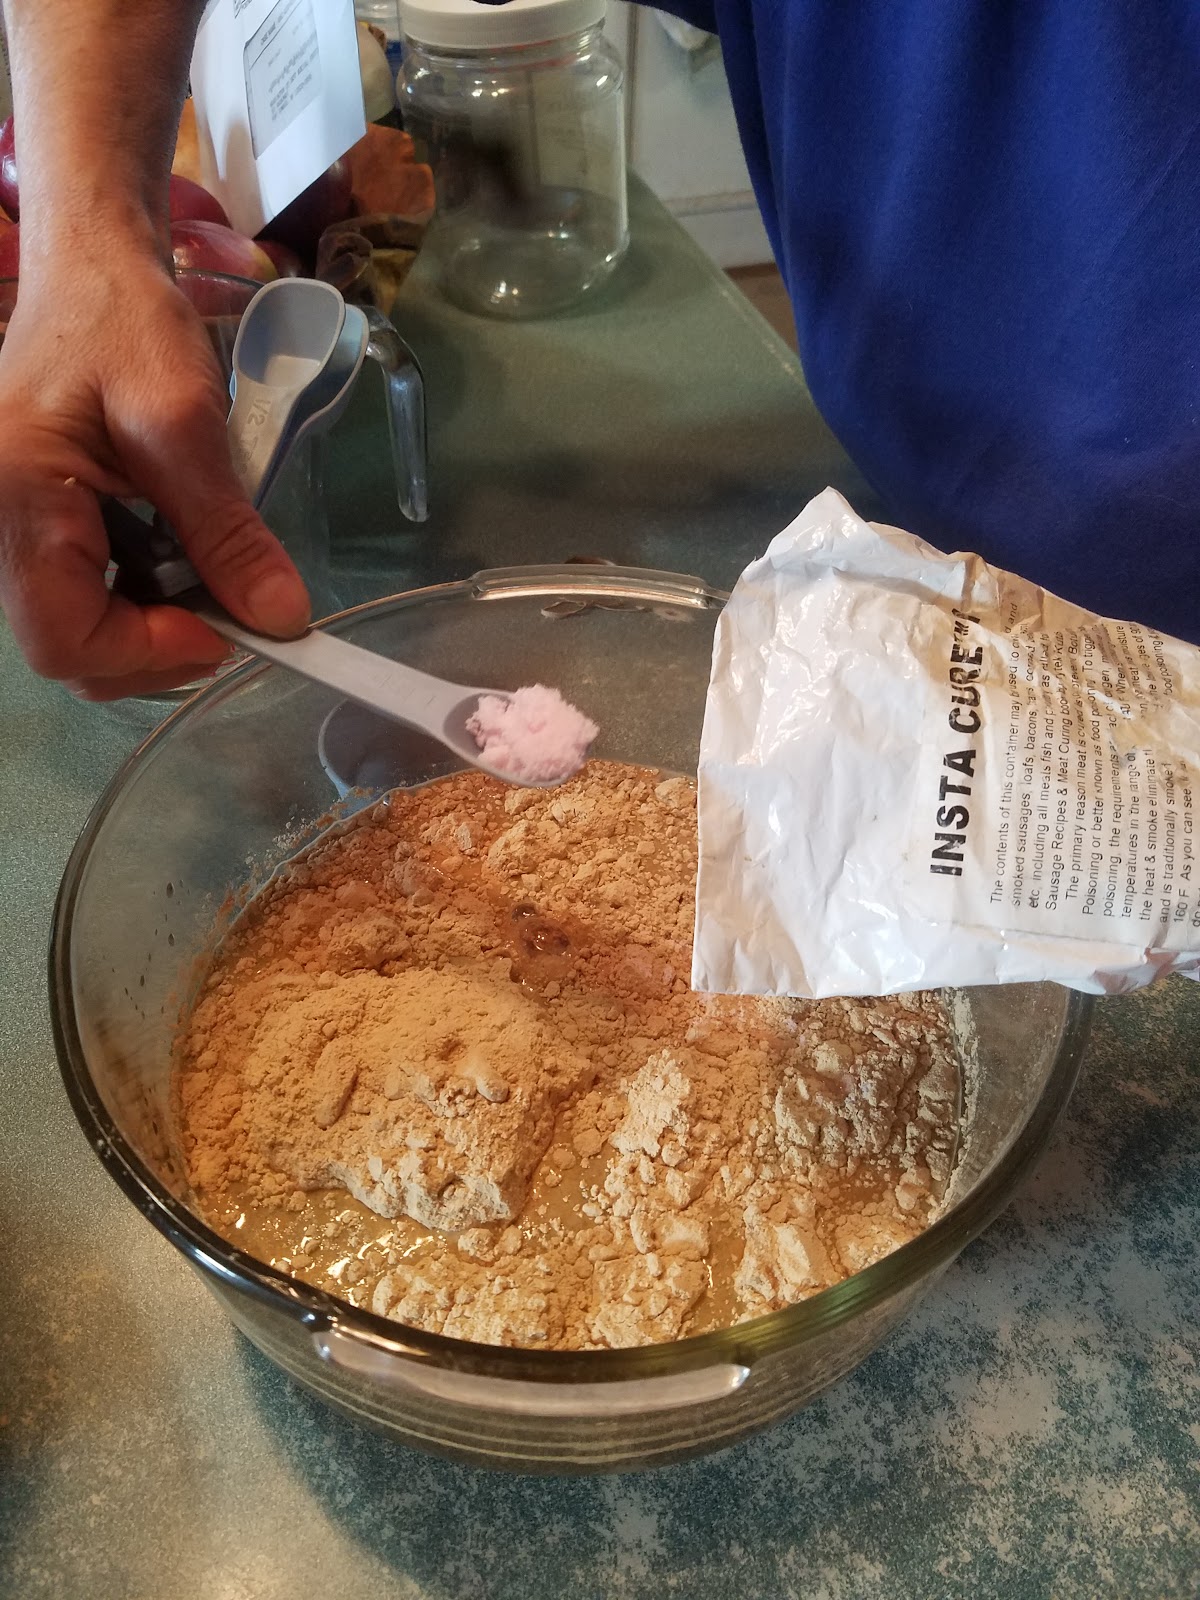
It can be difficult to thoroughly mix the ingredients together by hand, but we found a mixing wand really does an excellent job!

Add even amounts of the marinade to both bags.

Seal & Store
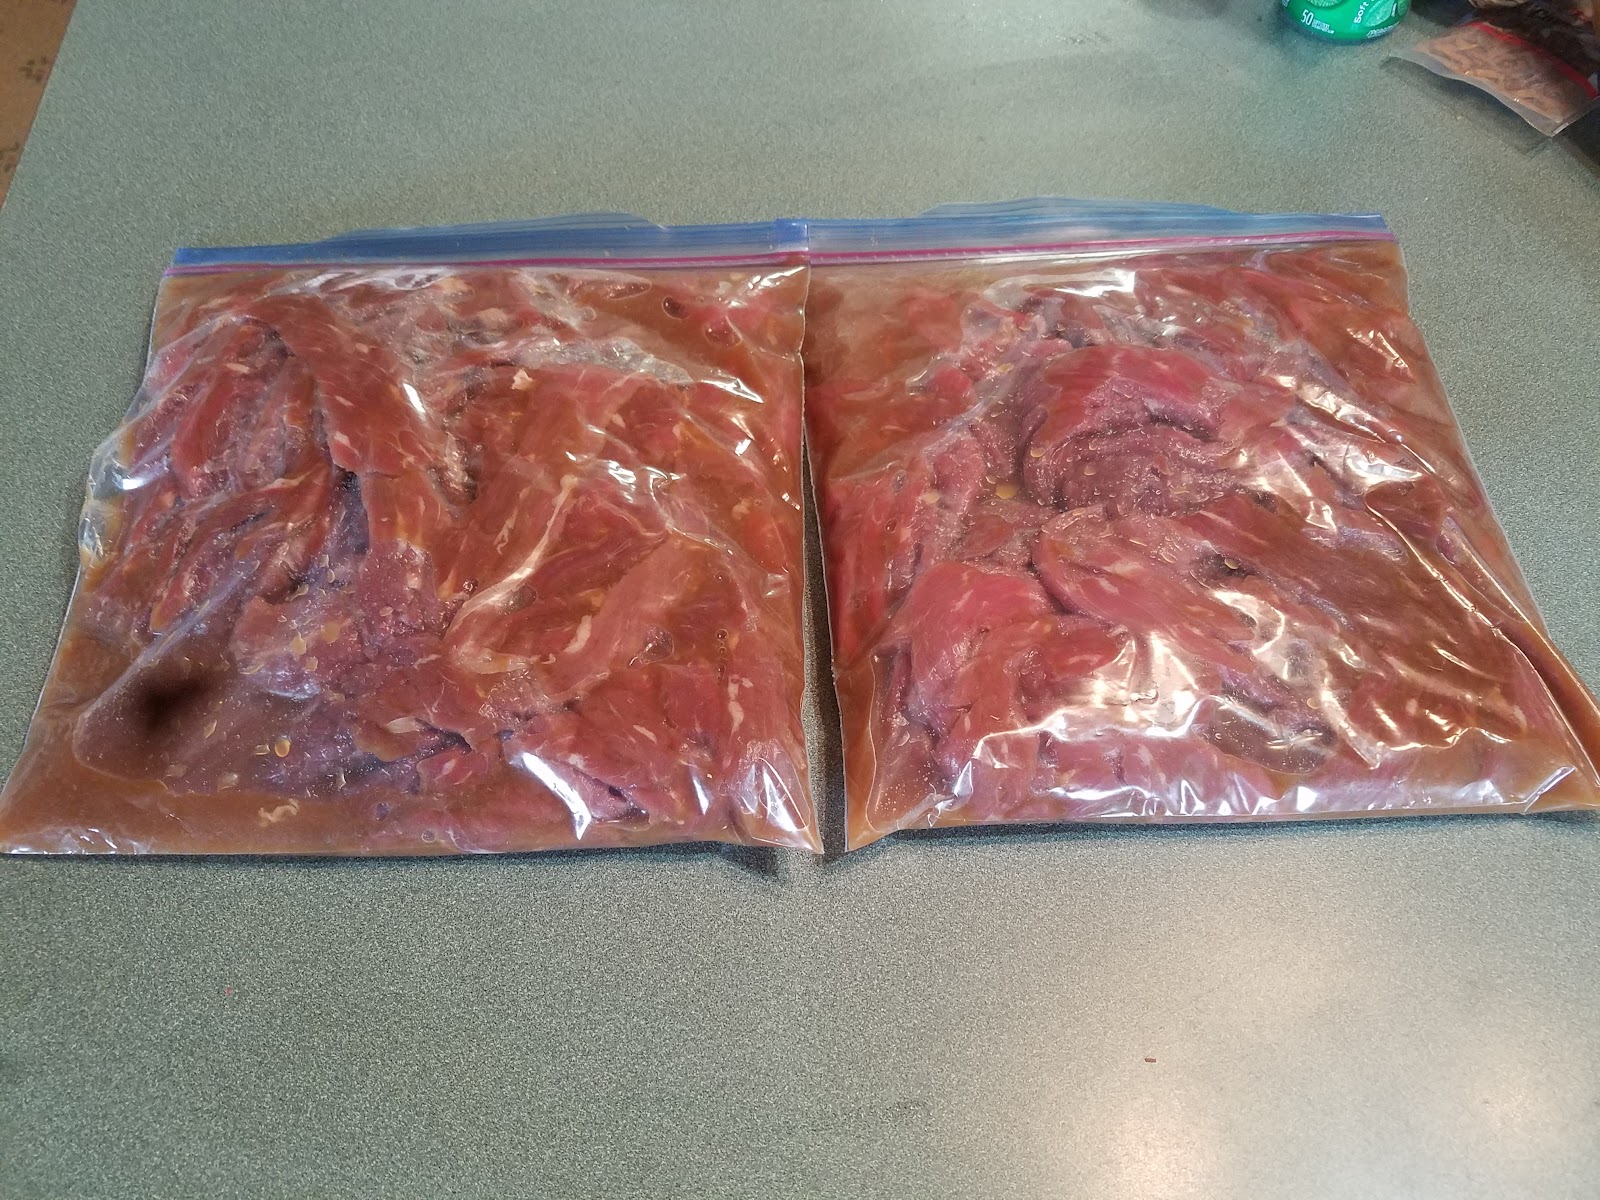
Seal the bags tightly and flatten them out. This forces the marinade and cure into the meat and helps them fit into the refrigerator better.
We marinade ours in the refrigerator for 24 hours and smoke them right away. Any longer and the jerky can get a bit too salty.
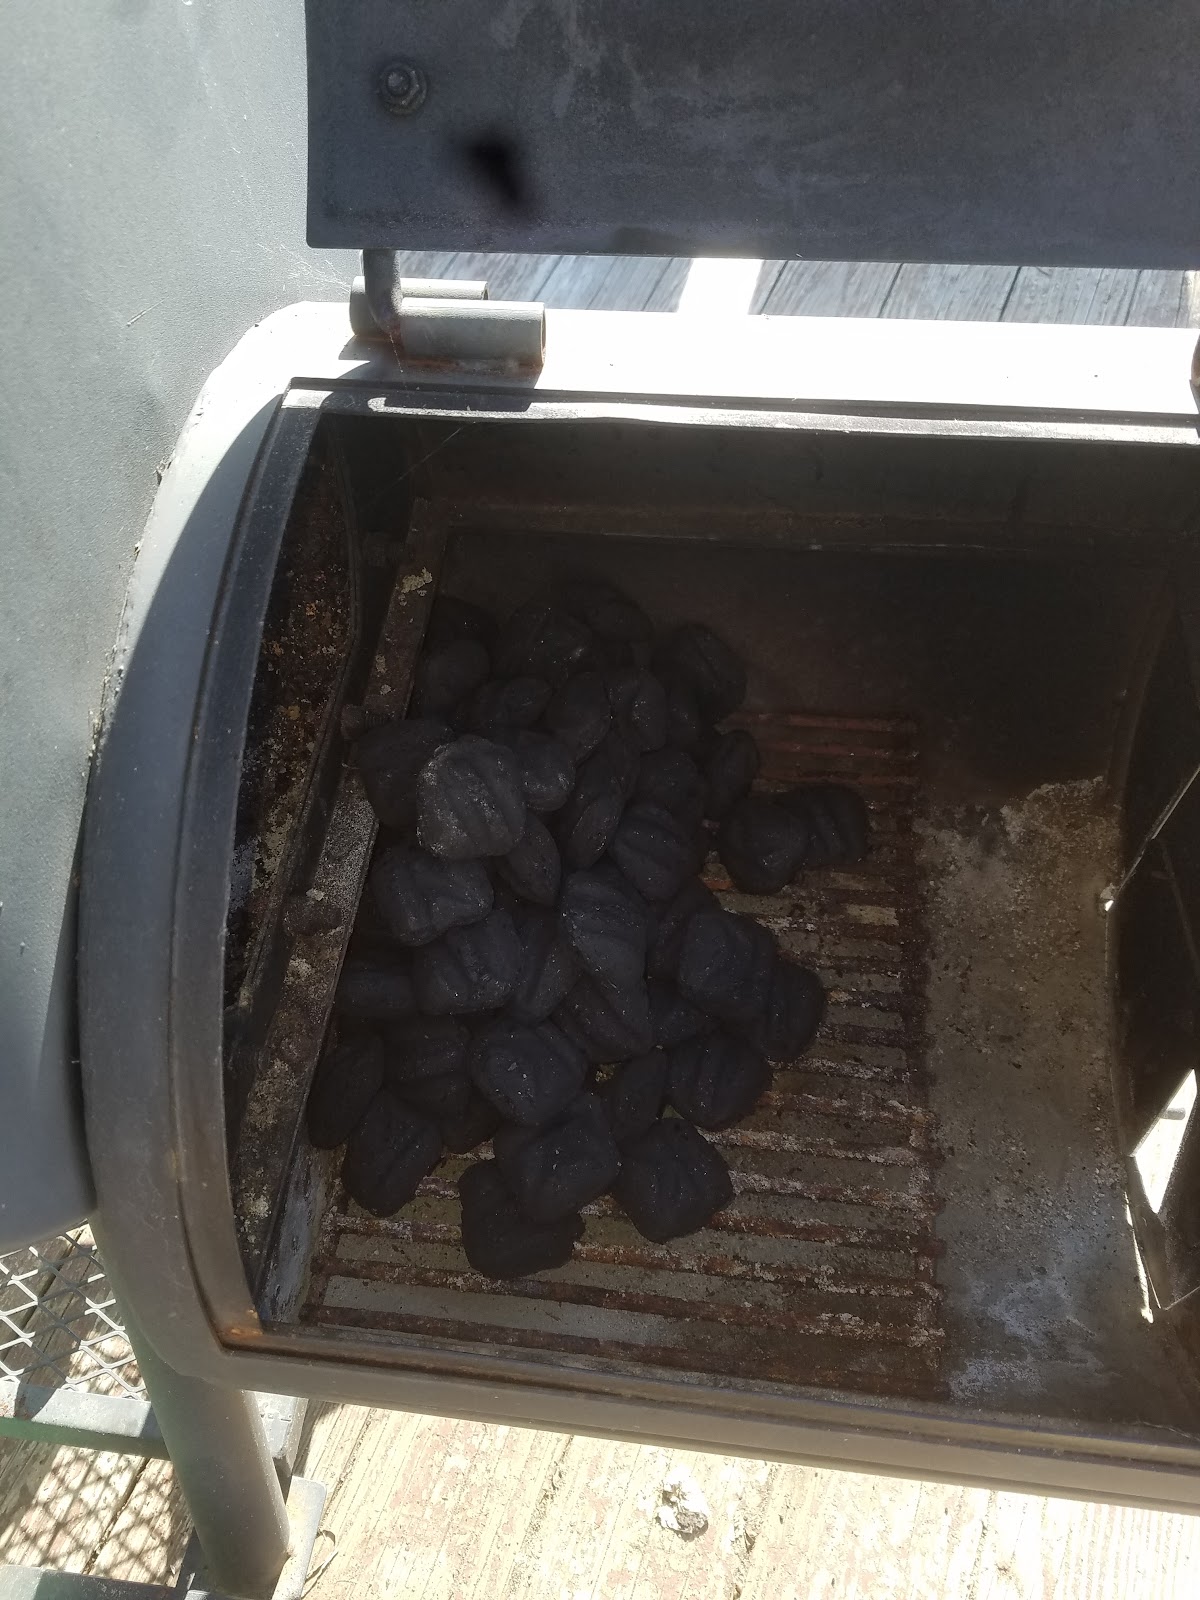
Fire Up The Smoker!
We use charcoal in our Oklahoma Joe smoker grill. Use can use whatever you prefer, but we love the smell of the charcoal smoke on our jerky.
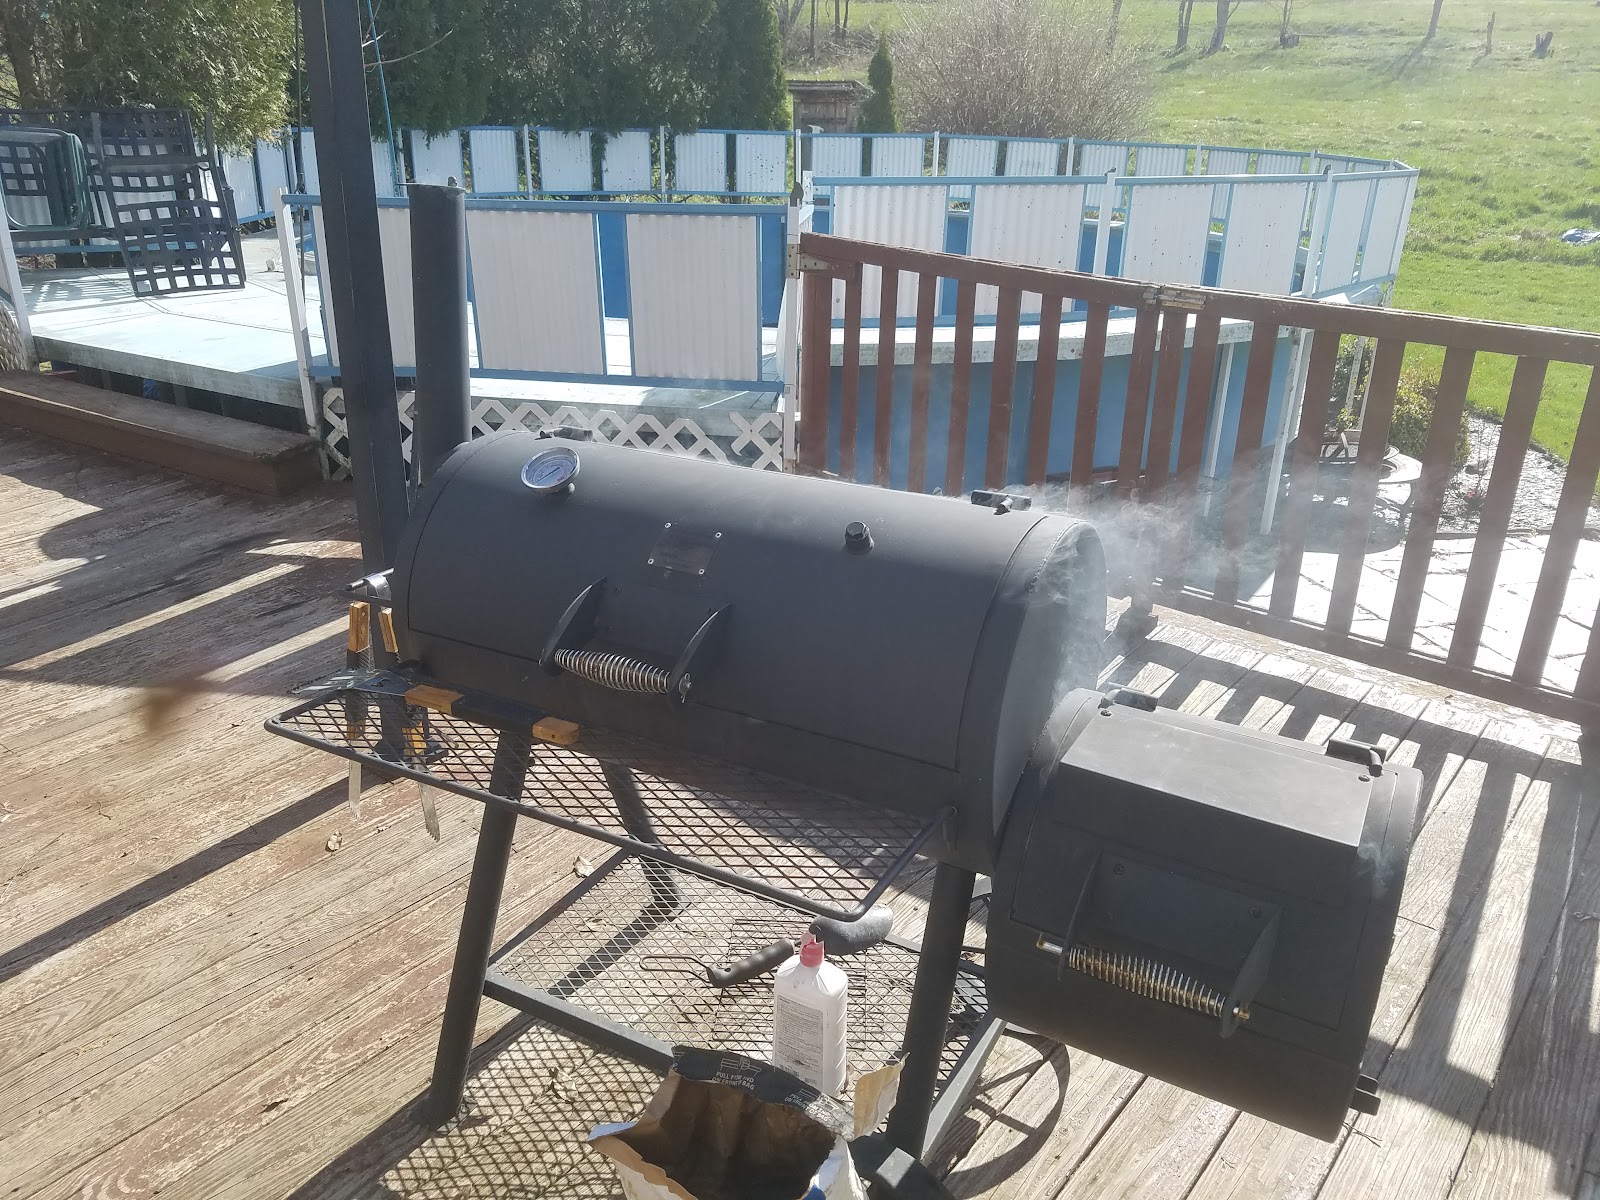
There is no direct fire on the jerky, all charcoal is placed in the smoke pot on the side.
Place the meat directly on the grill.
Strips should not touch each other for handling purposes. You want to ensure all of the jerky strips smoke evenly, or you will end up with some pieces that are too crispy, and others that are too chewy.

This is a warm smoke that we use, trying to maintain a temperature between 155 degrees and 200 degrees. We generally check the fire every 30 minutes and the meat every hour.

Enjoy Your Smoked Beef Jerky!
After 3-4 hours your jerky should be dry but still a bit flexible. It should be breakable, but not crispy. Air dry for a night indoors. Enjoy! Try different flavors, try different marinating times (but make sure to follow the curing instructions), and just have fun!

And that’s it guys, a tried and true way to make a savory batch of smoked beef jerky. If you have any questions or comments, please reach out below! We’d love to hear about your own jerky-making experiences too!
Thank you for spending some time with me,
Terry
Love, Peace, and Light!